
ok, oops. I had it on html for some reason (it wasn't that notable to mention but, anyway)
I'll start this post first off by saying, the title is a lie. My hobby buddy (I hope we're buddies) 5header posted a video to his youtube about his silly polymer clay orc heads a few days ago (nearly a week) and I've just grabbed this concept and been running off with it since. Now, I think my execution pales just a little to his (self flagellation) I do want to share the process of making one, because that's the whole point of having a blog! Why else would I make a blog post! I have nothing else to talk about!

Current orc heads I got -1 which I mailed to Tanner cuz I don't want it
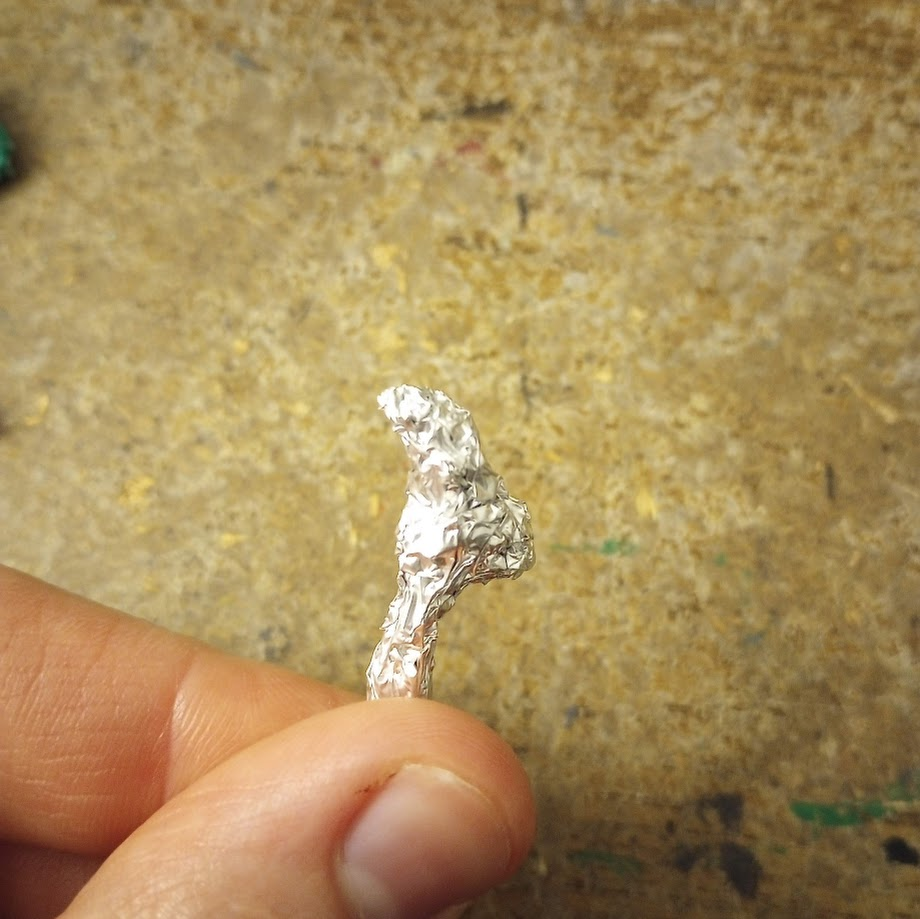
So, getting started is as simple as getting started. Bulking out a sculpt with aluminum foil is one of the surest ways to start so let's start there. I don't usually do this but it is much smarter than what I do (not this). With these heads I've been copying Joe's approach of leaving a lil holding nub, so I crinkle up that part first. I make it about an inch long, smaller than that it's hard to grip and bigger is just a waste. The rest of the foil I leave pretty loose, and I gentyl ease it into the rough shape I want. I love orcs with snouts so I'm going to be making one of those.


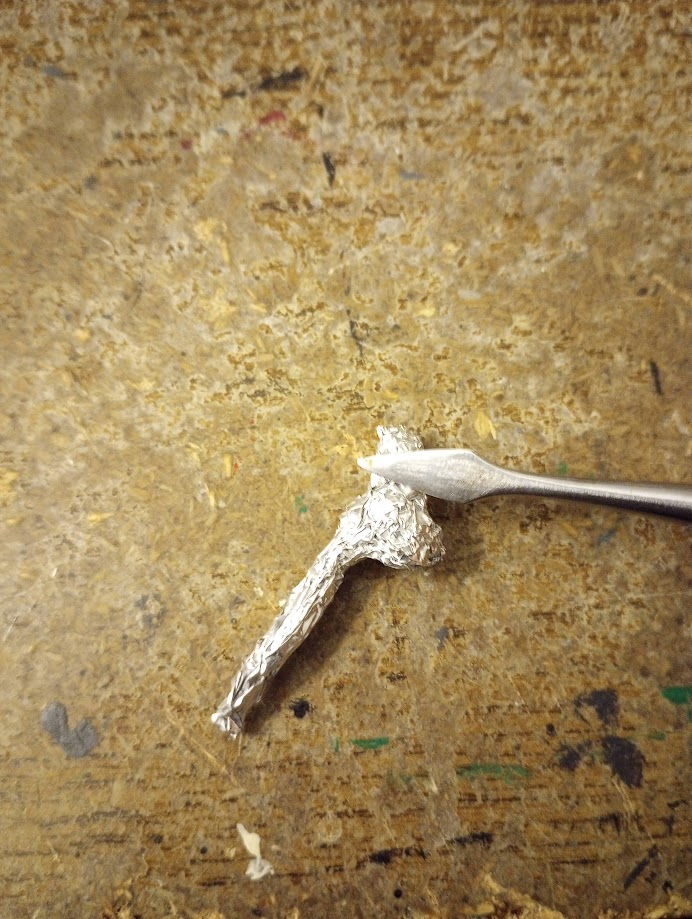
Once you've compressed it pretty much all the way you want, or you're having difficult compressing it more, you can take a metal tool and really push the foil where you want it (or smooth out rough bits you can't smooth by hand).

cool, good enough. You've drawn the circle, now add all the details. Polymer clay goes on. Pick where the features are gonna be. A face in it's simplest form is eyes, nose, and a mouth. Add the cheekbones to really define the features. For orcs, I do vertical creases all down the top lip because thats how Paul Bonner does it and he's right! I usually add the ears after I've roughed the face in a bit. A trick fo rears when you're trying to sculpt them: An ear is basically C shaped with a y in the middle. Where the tail of the y goes down, there's a lil nub opposite it and behind that is the ear hole. I hope that makes sense. I don't always sculpt all those details (usually I don't, lazy) but I know a lot of people struggle with ear anatomy. It's a y inside the ear. Keep that in mind, dear reader!
 |
| this is you |
 |
 |
 |
| See, ears. |

 |
| he went from being squinty to buggin out fr |
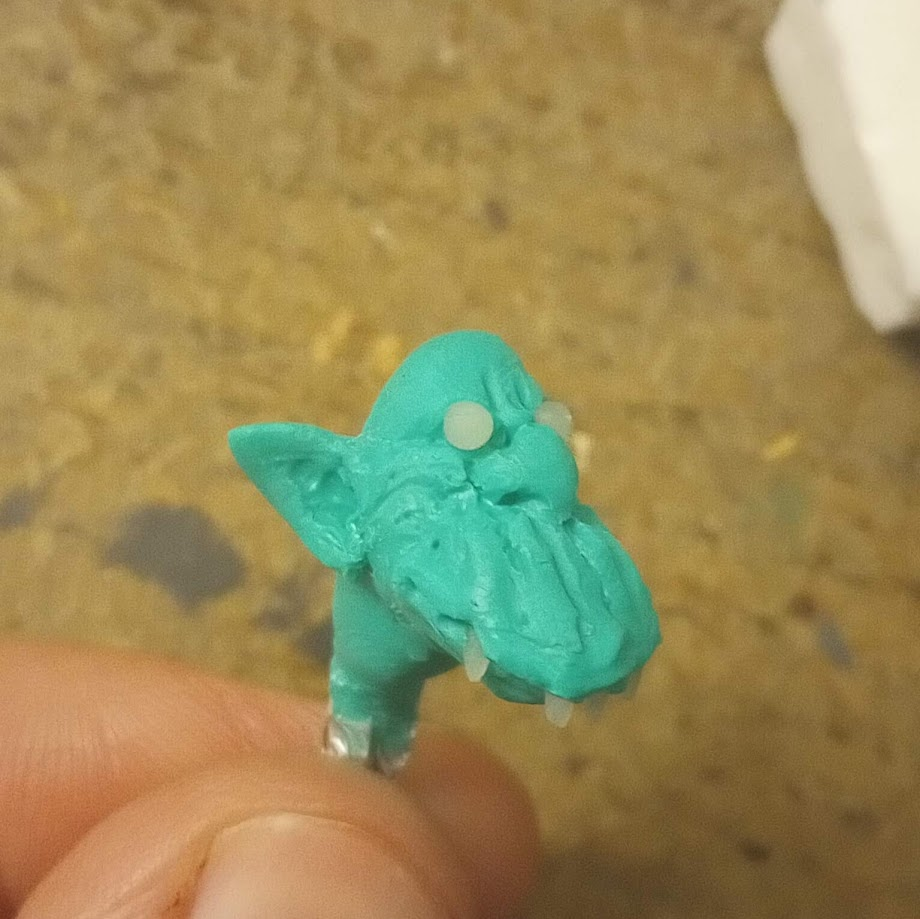
Now, you can sculpt teeth and eyes with fresh clay and you don't have to use different colored clay for it. For the last four heads I've sculpted I had premade eyes and teeth ready to go for them. I have some mixed feelings about this. For long teeth, it's great, no notes. You can stick 'em into the clay and don't have to worry about them bending. chef kiss, mwah. Short teeth and eyes, I think you can use fresh clay and it works out perfectly fine. An issue I have with premade eyes is, if you don't have enough clay over the foil it's hard to get them as recessed into the sculpt as you want. I mean, as I want. Also, if you only sculpted big eyes but you want some tiny lil squinty eyes it's like, dang I guess I can't do that! I think once I use the last lil eyes I premade I'll just use unbaked clay for eyes going forward. I do also think it's very charming to use different colored clay for eyes and teeth, especially this fimo.
Ok well that's that.
Bye!


No comments:
Post a Comment